.png?width=300&height=68&name=Lockup_Primary_RGB_IE%20(3).png)
- Pick your gift
- Product options
- Shipping details
To navigate to Claim Link Templates
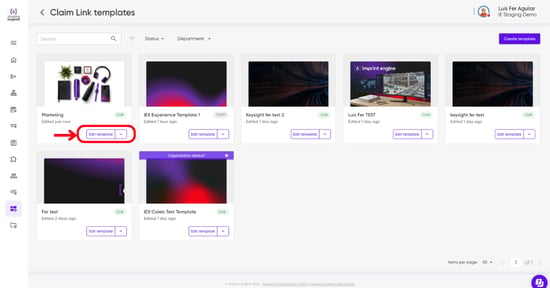
Open the Experience Manager menu from the main navigation or sidebar and select Claim Link Templates.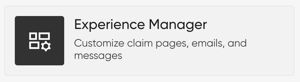
- Create a New Template
Click the purpleCreate templatebutton in the top-right corner of the dashboard.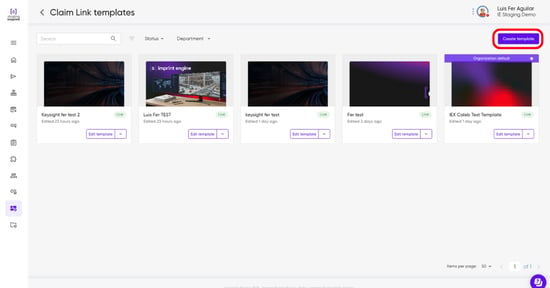
Step 1: Initial Template Setup
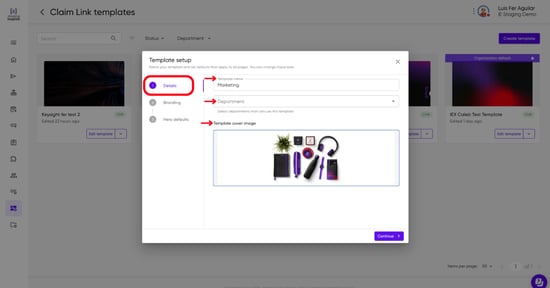
Configure Template DetailsIn the Template Setup pop-up, complete the following fields under the Details tab:
-
-
- Template Name: Enter a recognizable name (e.g.,
MarketingorQ3 Promo Claim), Its only for internal purposes. - Department: (Optional) Select an applicable department from the drop-down menu.
- Template Cover Image: (Optional) upload a cover thumbnail (
PNGorJPG, max 3MB) to help identify this template in your portal dashboard. - Click
Continueto proceed to branding setup.
- Template Name: Enter a recognizable name (e.g.,
-
Step 2: Branding & Styling
In the Branding section of Template setup, define the overall aesthetic across all claim pages, by default, the values will be pre-populated with the colors and logo of the Portal / Organization: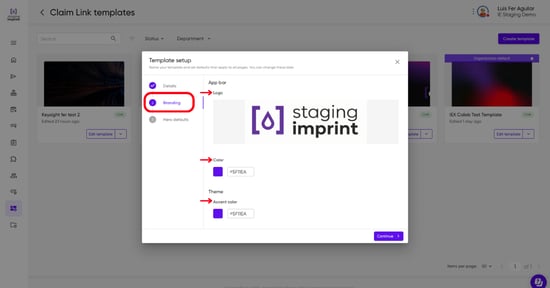
- Logo / App Bar Image
Under the App bar section, clickChange imageto upload your brand logo (max 5MB). - Primary Brand Color
Enter your hexadecimal color code into the Color field (e.g.,#E90029).
This color will be reflected in the top bar of the Claim Page. - Accent Color
Enter your primary accent hex code into the Accent color field under Theme.
This color will be reflected in the buttons on the Claim Page - Click
Continueto move to the Hero defaults tab.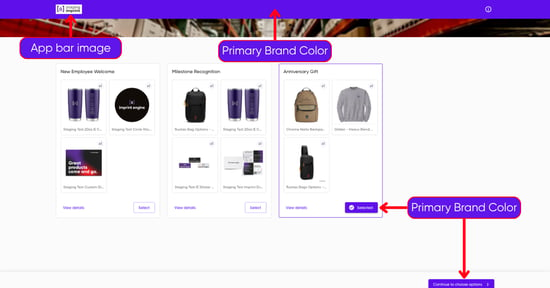
Step 3: Hero Area Defaults
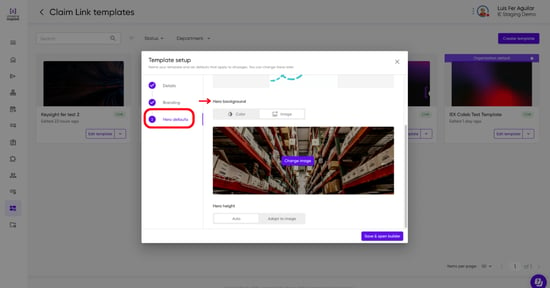
- Hero Media
Choose to keep, replace, or remove the hero banner media (max 5MB) using the upload area orChange imagebutton. - Hero Background
Select either a solid color (e.g.,#E90029) or upload a background image, you can adjust the image height by choosing betweenAuto adjustorAdapt to image. - Save and Open Builder
ClickSave & open builderin the bottom-right corner to launch the page content editor.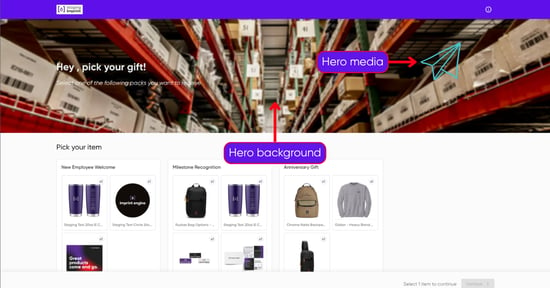
Step 4: Page Content Customization
The builder allows you to customize messaging across all three stages of the claiming experience:
1. Pick Your Gift Page
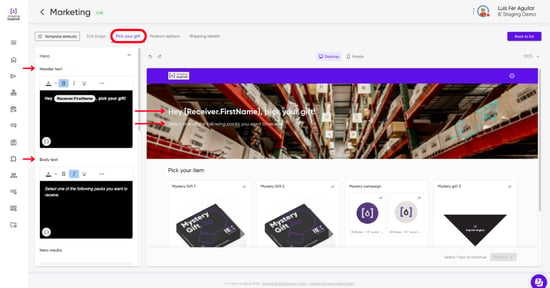
Click on the Pick your gift tab:
- Header Text: Edit the primary greeting using rich-text controls. You can include dynamic variables like
Receiver.FirstName(e.g., "Hey Receiver.FirstName, pick your gift!"). - Body Text: Customize recipient instructions (e.g., "Select one of the following KITS you want to receive, then click on continue.").
- Text Formatting & Customization: Highlight any text within the Header text or Body text fields to access the rich-text toolbar. From here, you can customize font styling, adjust text alignment, change font colors, or click the three dots (...) for additional formatting tools.
2. Product Options
Click on the Product options tab:
- Body & Selection Messaging: Update guidance text for selecting item specifications (such as sizing, color, or individual item options within a kit),
(e.g., "Here’s the sizing lineup so you can lock down your best fit.").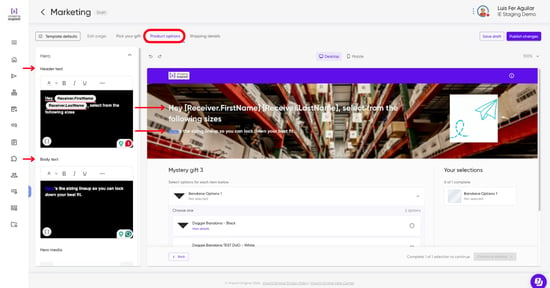
3. Shipping Details Page
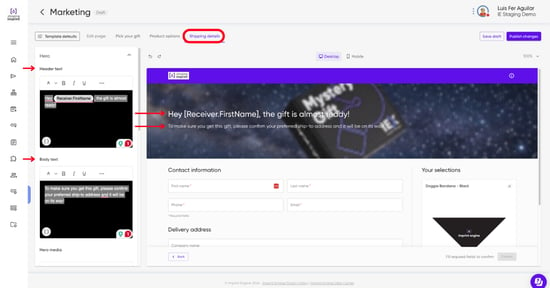
Click on the Shipping details tab:
- Header Text: Provide final call-to-action text (e.g., "Hey Receiver.FirstName, the gift is almost ready!").
- Body Text: Input final address instructions (e.g., "To make sure you get this gift, please confirm your preferred ship-to address and it will be on its way!").
Step 5: Save & Publish
- Previewing: Toggle between
DesktopandMobileviews at the top of the canvas to verify page layouts.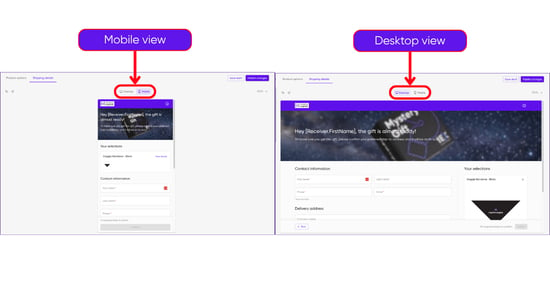
- Saving Drafts: If you need to make changes later, click
Save draft.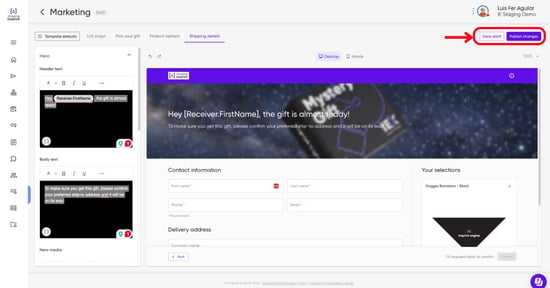
- Publishing: Once satisfied with your edits, click
Publish changesin the top-right corner to make your template live.
Tip: You can return to Experience Manager > Claim Links templates at any time to edit existing templates, change defaults, or assign templates to specific campaigns.
General recommendations for header image:
- Size: 1920–2560 px wide. A wide banner shape like 1920 × 720 (8:3) works well, but getting the width right matters more than matching an exact ratio.
- Format: JPG, compressed to roughly 200–500 KB (the upload limit is 5 MB).
- No text or logos in the image. Header text and the hero image are added separately in the builder, and anything baked into the image can get cropped or shrink to unreadable size on mobile.
- Background vs. standalone: if you're adding header text or a hero image on top, choose something that works as a background — a texture, pattern, gradient, or soft photo — since text may land anywhere on it. If the image stands on its own, a clear-subject photo works fine, just keep the subject away from the edges.
- Mobile cropping: mobile shows the same image in a narrower, taller header, so the sides get cut more there — keep important content centered.
- Contrast: keep it calm so any header text placed on top stays easy to read.
Need Help?
If you have any questions or need further assistance, please contact our support team at support@imprintengine.com